A Step-By-Step Guide To Romantic, Soft Glam Makeup For Valentine’s Day

Alisha Bhojwani is a Sydney-based digital strategist and content specialist. When she's not reminding her friends to wear SPF, you can find her drenching her face in Vitamin C and consuming copious amounts of peanut butter. You can find her on Instagram here @alishabhojwani_.
I’ve had a lot of Valentine’s Days. Some involved dates, some involved dissecting texts and some involved getting ready with absolutely no plans. Every single one of them had one thing in common - I was matching my makeup to the occasion or experimenting with it.
Yet somewhere along the way, my approach to makeup completely changed.
These days, I’m way less interested in dramatic looks that feel like armour. I don’t want to feel cakey, overdone or like I’m wearing a mask. I want makeup that feels soft, flattering and well... very me.
That’s why lately, I’ve been feeling called to more ‘romantic makeup,’ something that lets me drop into my feminine and lets me embody it.
To me, romantic makeup, is about looking fresh, glowy and most importantly feeling comfortable in your own skin.
But how do we actually achieve that?
The key to a natural Valentine’s makeup look is keeping everything light, blended and wearable.
After all Feb 14th falls back smack in summer and even if you have AC blasting 24/7, you’ll eventually have to leave your home and wearing foundation in this humidity is just… uncomfortable.
That’s why my preference is to lean into skin tints, creams and mists... anything that melts into the skin instead of sitting on top of it.
Think soft colour that enhances your features rather than taking over your face. And makeup that still looks good when you’re laughing, eating, talking and doing all the things you don’t want to be worrying about your makeup for.
This my step-by-step routine to enhance what you already have, while leaving you feeling sexy and irresistible.
Let’s get into it.
Step 1: Skin Prep for a Soft, Glowy Base
I’m sure you’ve heard this before, but great makeup always starts with skin prep. And for this look, the goal is skin that looks good up close…the kind that makes people wonder what you’re using, not how much.
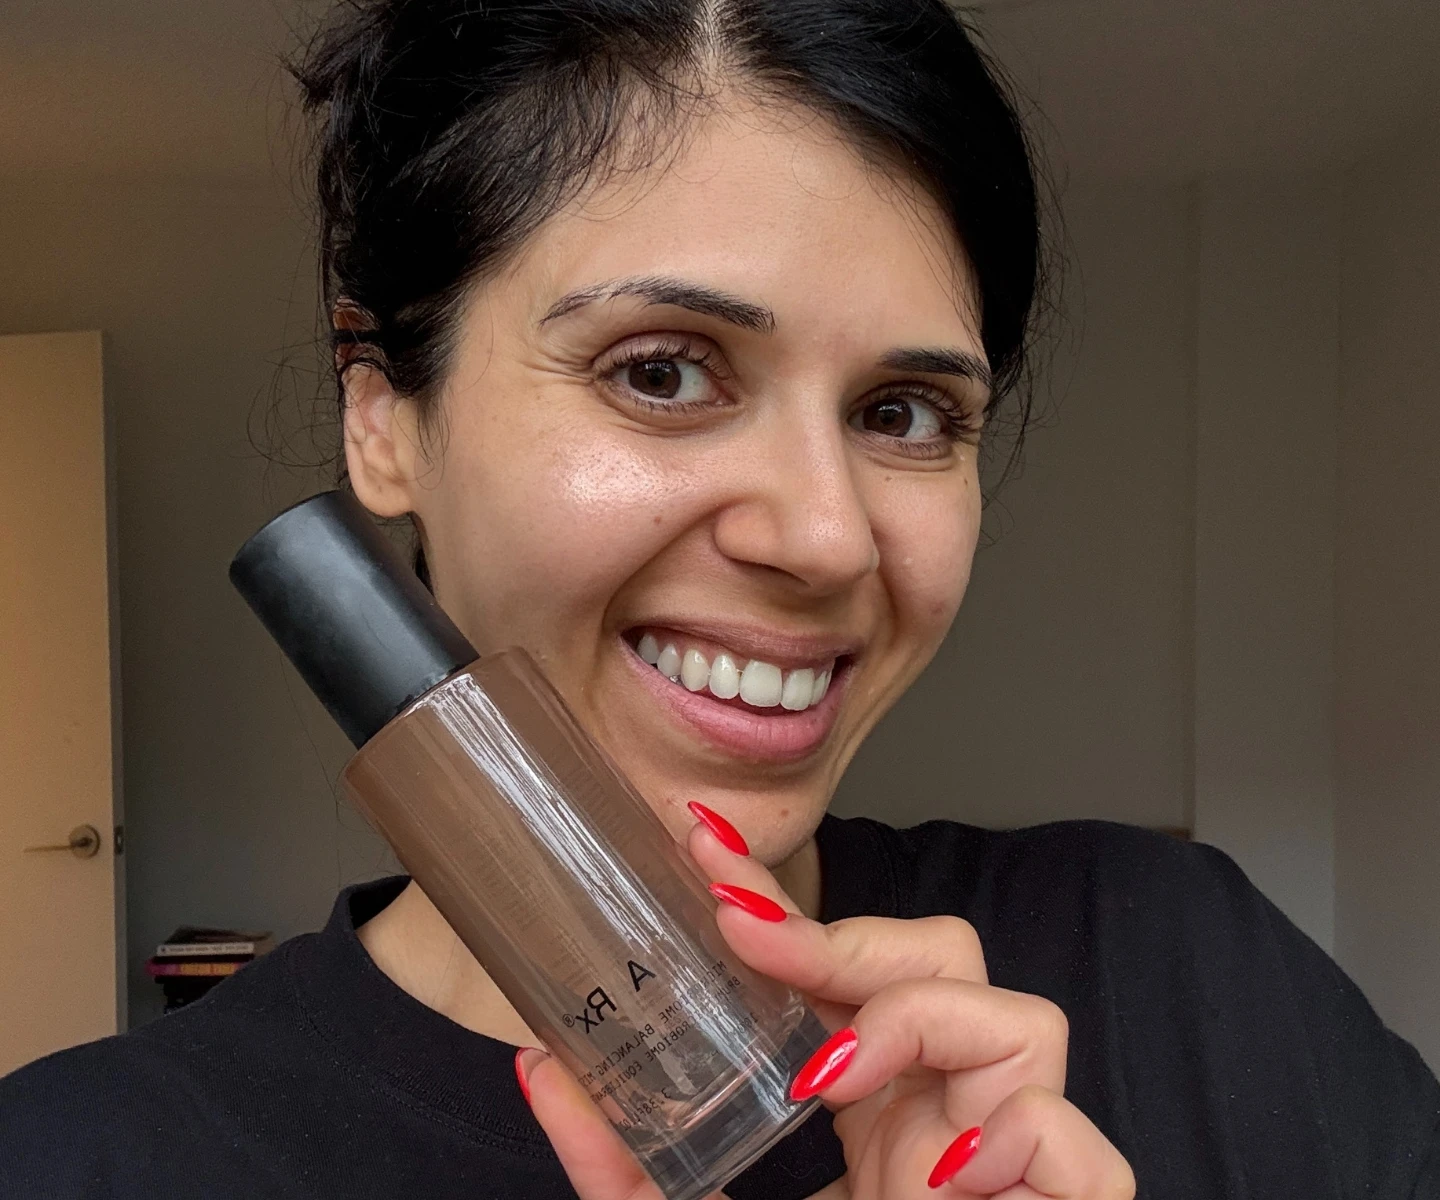
I like to start with a hydrating facial mist like the Aesthetics Rx Microbiome Balancing Mist, followed by your usual skincare routine. Once my skin feels plump and hydrated, I go in with e.l.f. Power Grip Primer which is a little tacky to help everything stay put while still adding a slight blurring effect to the skin.

For my base, nothing compares to Make Up For Ever Super Boost Lightweight Moisturising Skin Tint. Dare I say it’s one of the best skin tints I’ve ever used. Just two fingers worth of application evens out skin tone without covering your skin completely.
Personally, I like to apply with my fingers to get the coverage and then use a damp sponge so it melts in and looks effortless.
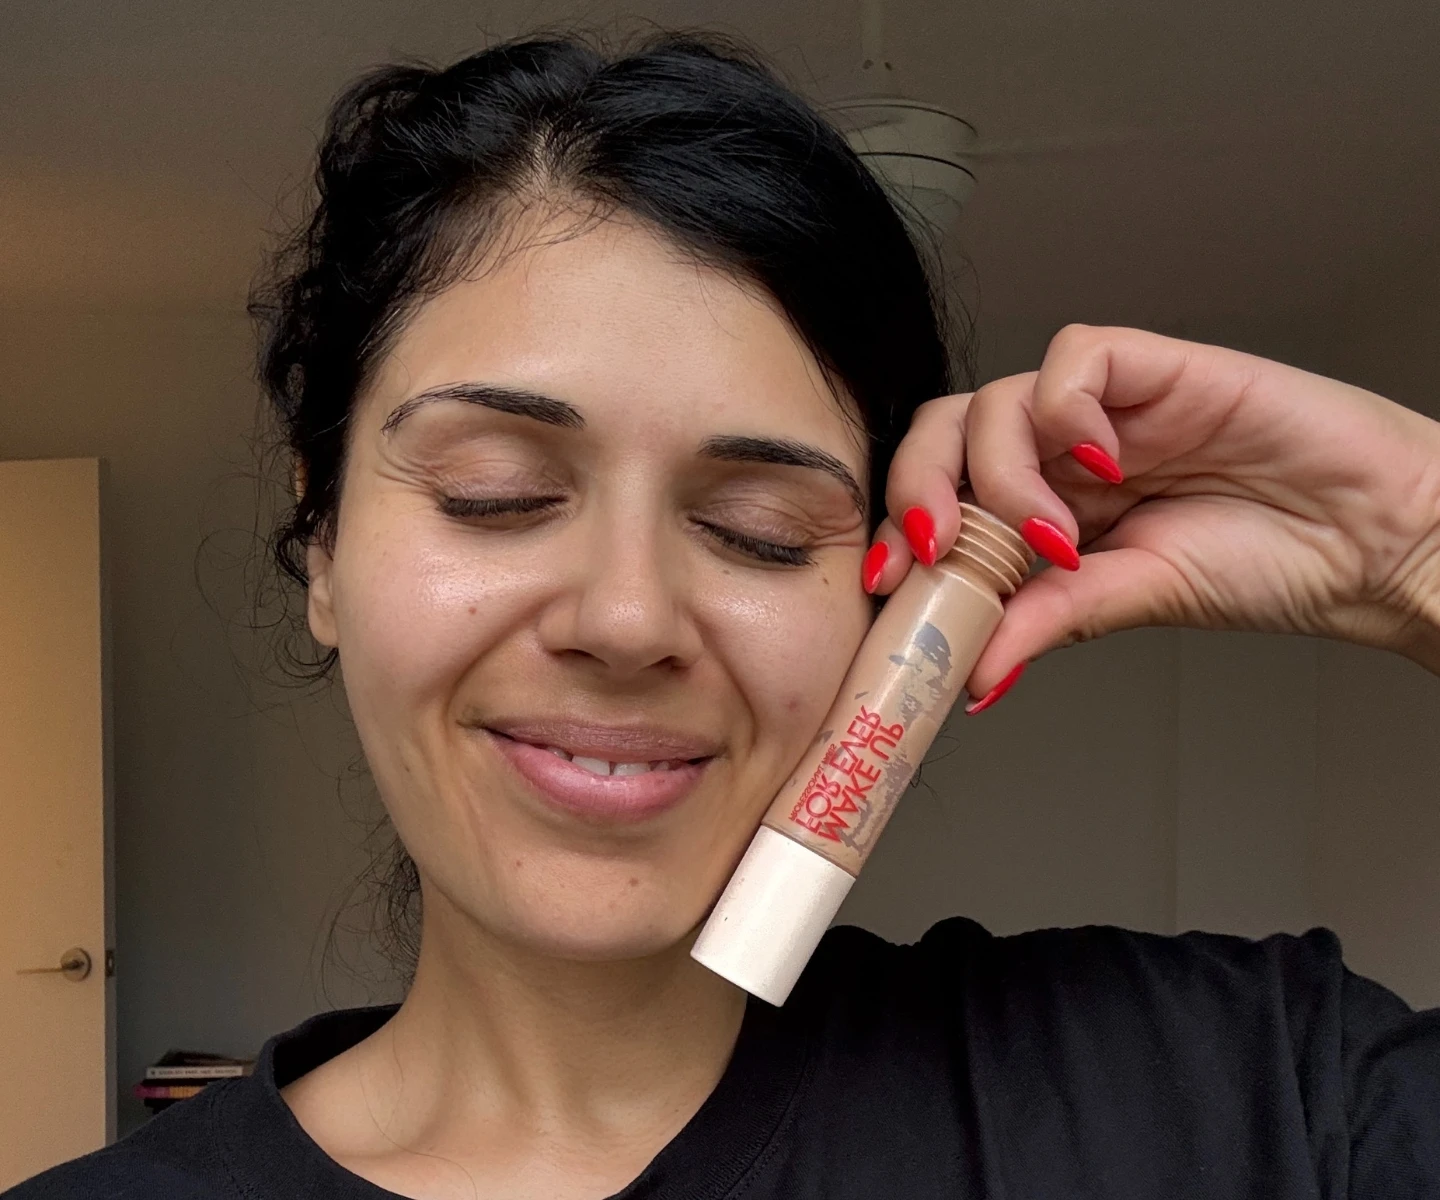
With concealer, I keep it pretty minimal and just go in with L’Oreal Paris True Match Concealer - two shades lighter than my skin tone to add brightness without pulling any ashy undertones in. I’ve found using the warmth from my finger tips allows this to blend seamlessly in areas I have slightly more hyperpigmentation (dark circle I’m looking at you!!)
Step 2: How To Achieve Soft, Flushed Cheeks
Now, blush is the hero of this look - No debate.
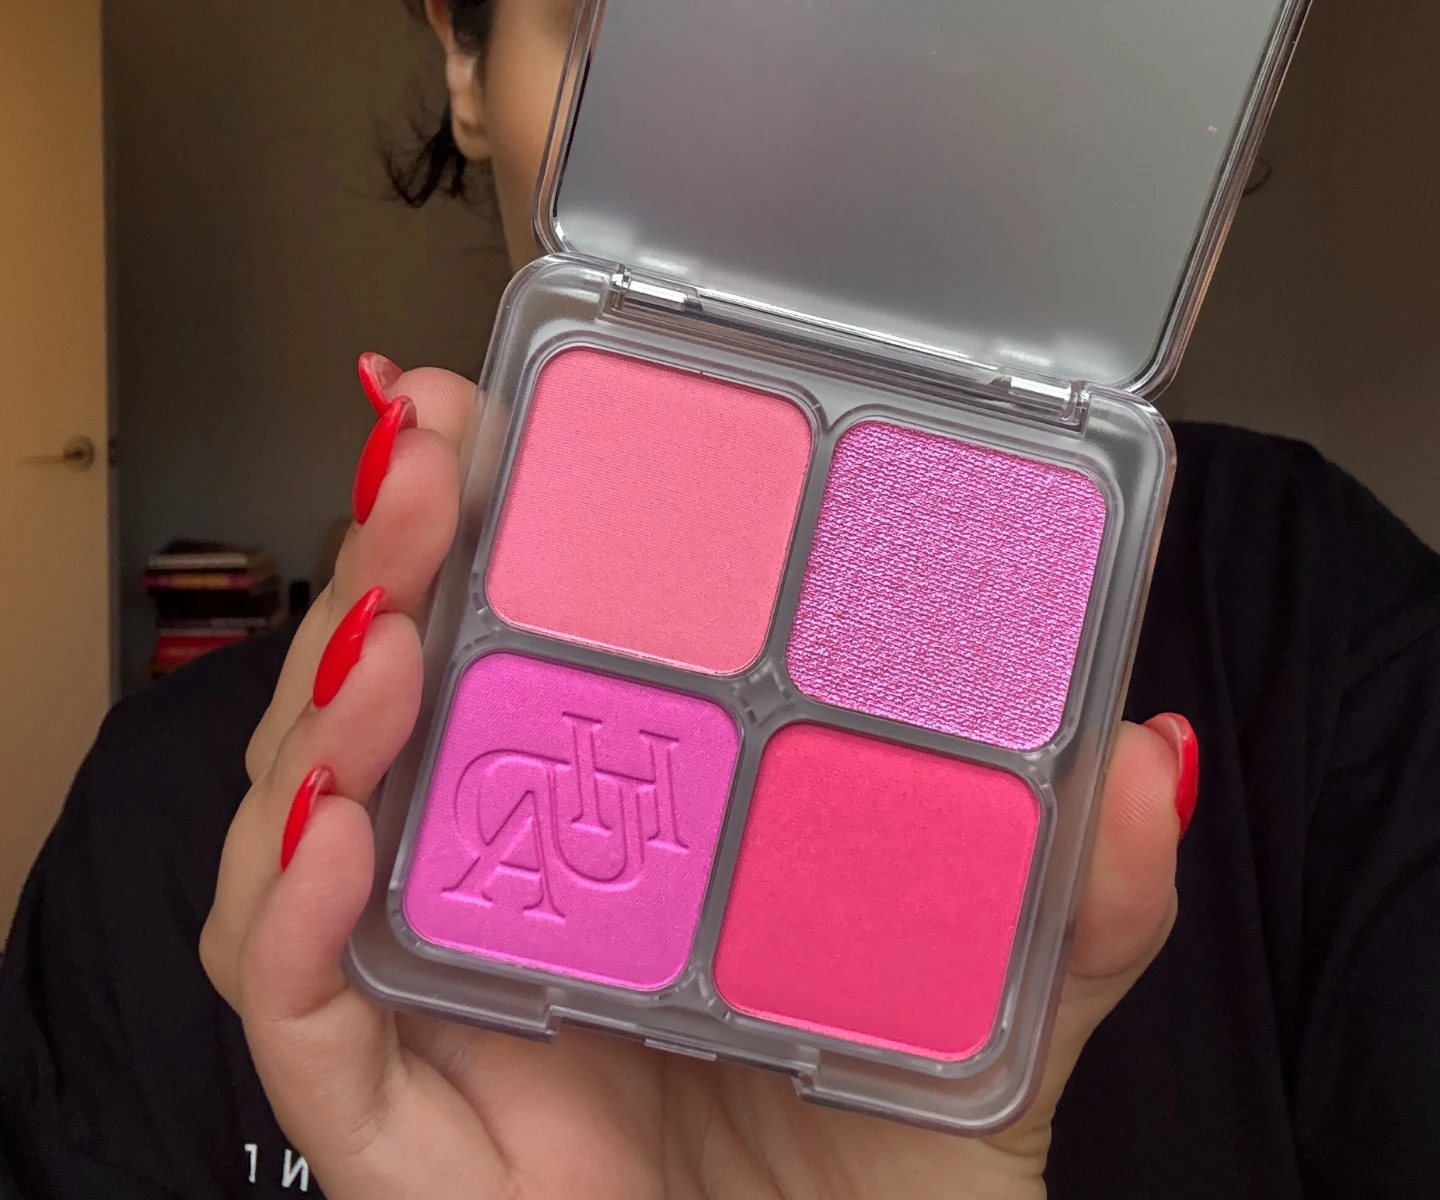
I apply the Huda Beauty Blush Filter Blurring Blushlighters Palette in Baby Pink to the apples of my cheeks, blending upwards toward the temples. Because nothing screams romance quite like soft pink, rosy cheeks. It gives that fresh, feminine flush that instantly lifts the whole face.
And the pigmentation? So good. A little goes a long way, and the formula genuinely blurs the skin, which I love.
I also take the highlighting shade from the palette and tap it onto the high points of my cheeks which just ties the whole cheek together.
Step 3: Add Warmth with Bronzer
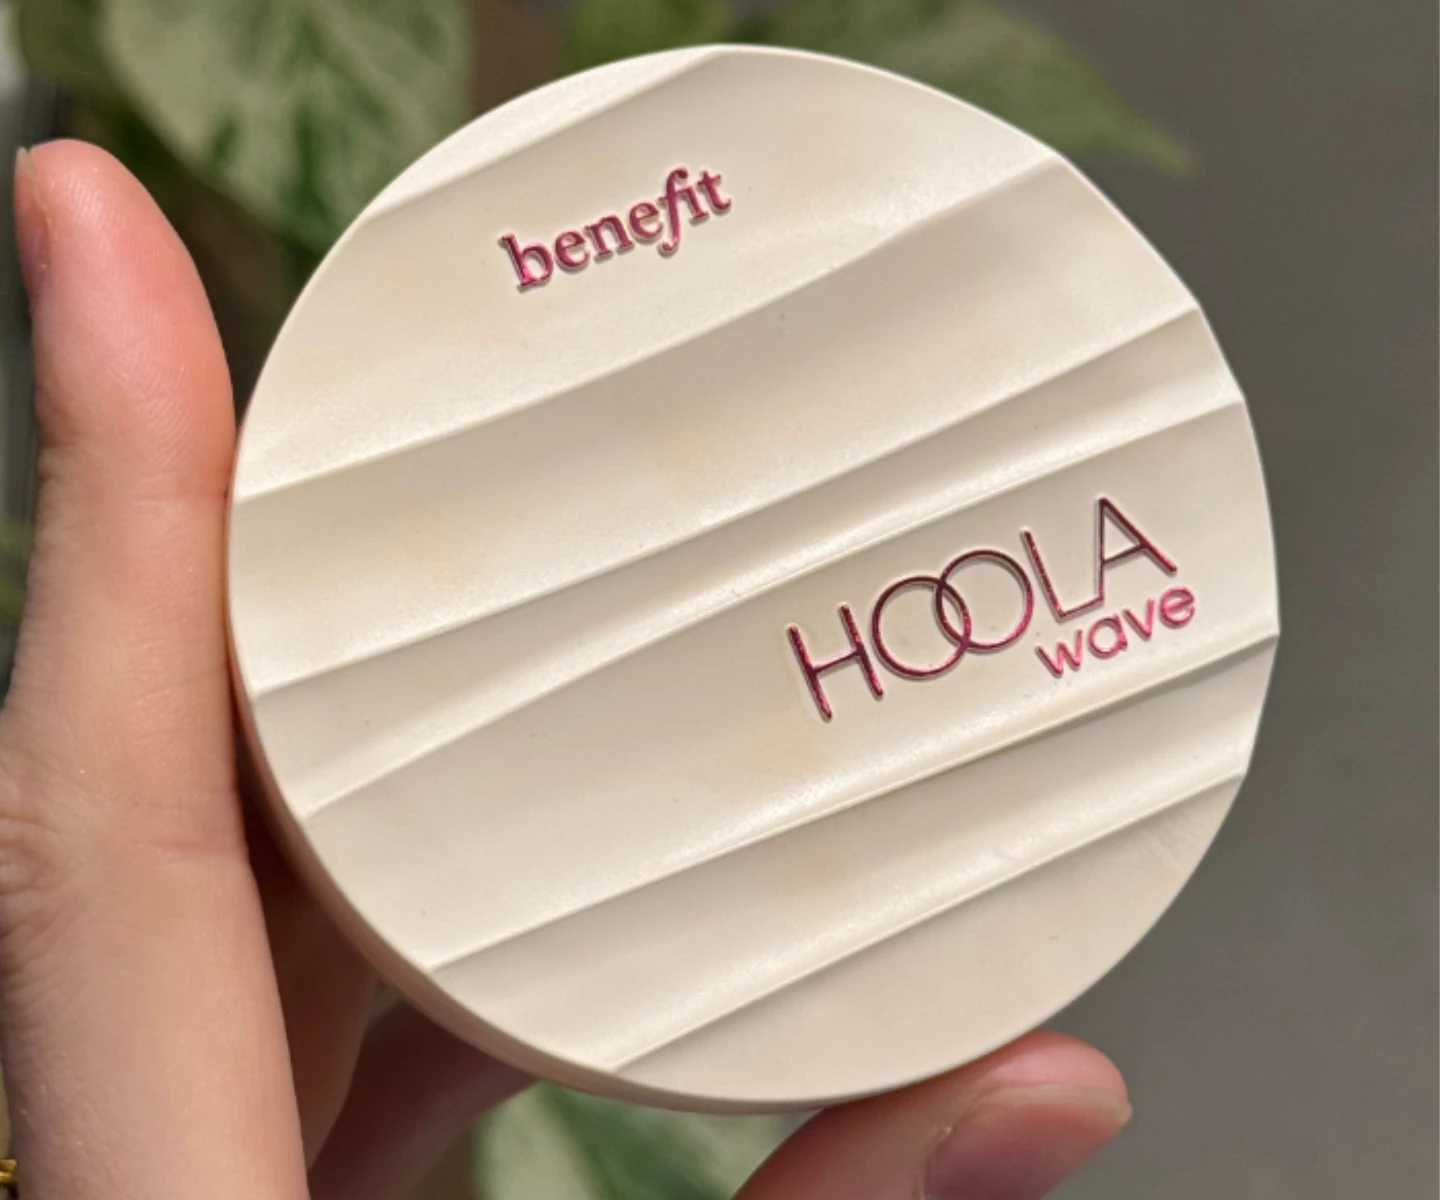
Next, I add a little warmth with the Benefit Cosmetics Hoola Wave Bronzing Balm, and this formulation is really cool. It’s a cream when you look at it and touch it but blends out to be a soft diffusing powder finish. Similar to the Huda Beauty Blushlighters, it’s pretty pigmented so don’t be heavy handed with this!!
Remember, this step is about looking warm and softly sculpted, not contoured. Think subtle definition that makes your face look naturally snatched without anyone being able to tell why.
Step 4: Dreamy, Romantic Eyes
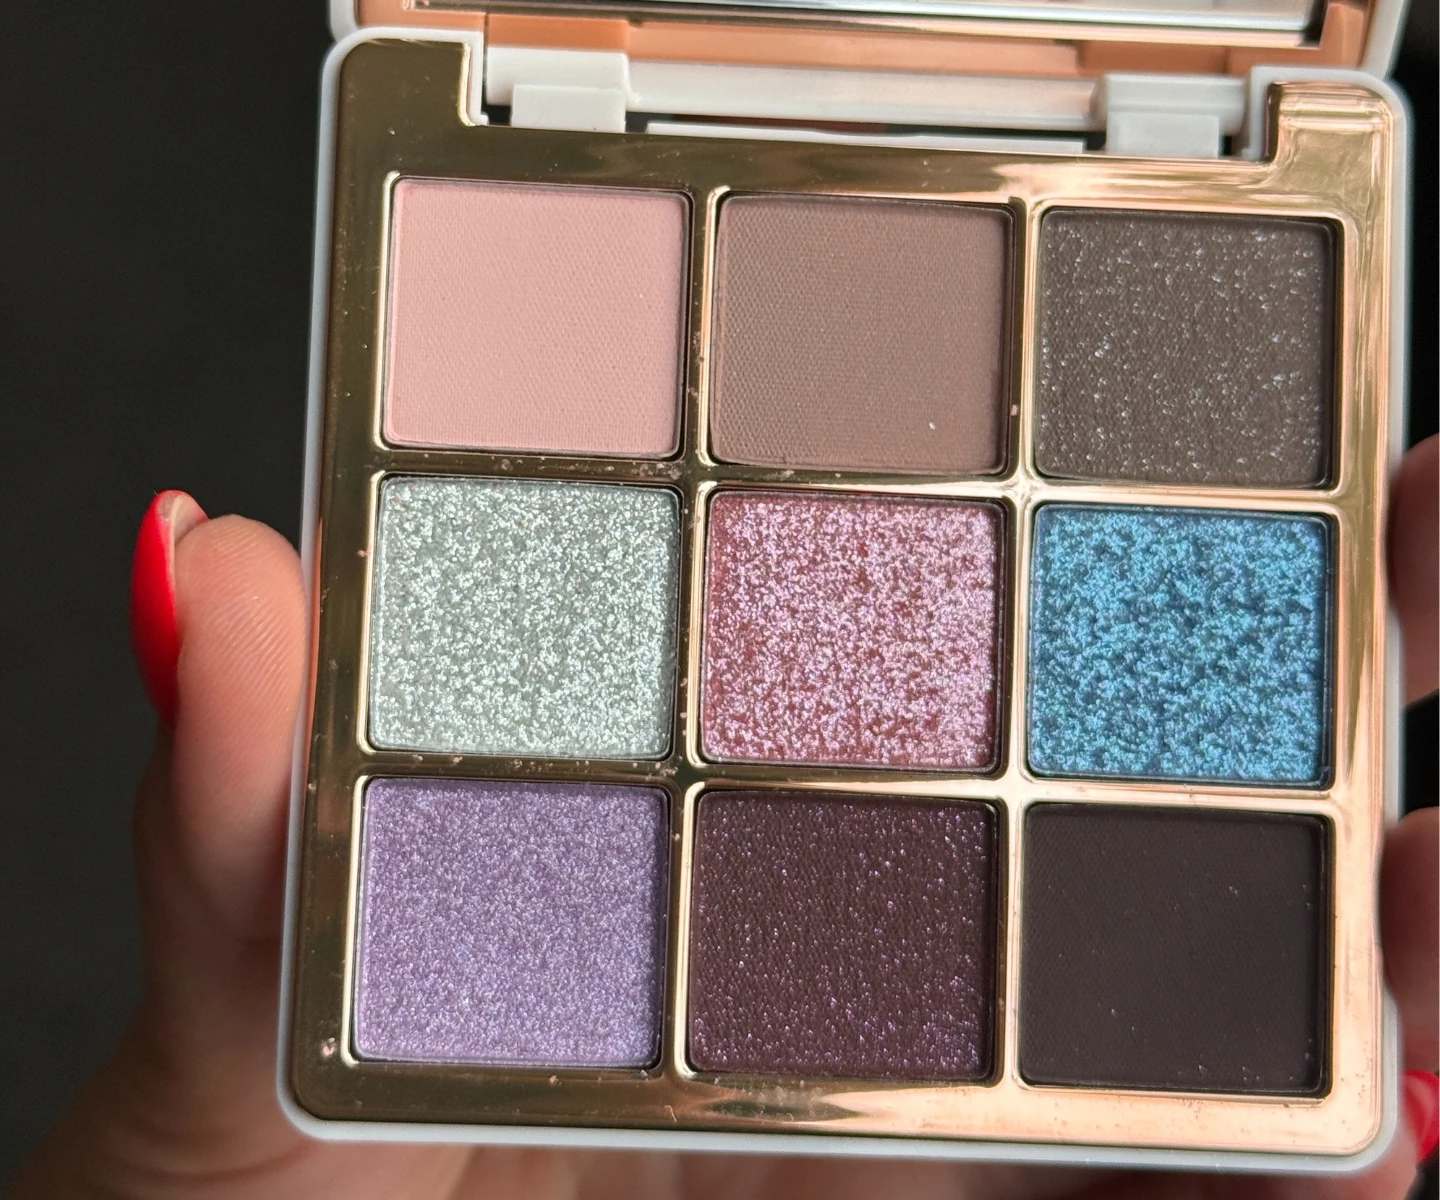
For the eyes, things need to feel cohesive, so I dip into the Anastasia Beverly Hills Mini Sugar Palette, sweeping a light shimmer or neutral shade across my lid, then blend a slightly deeper tone into the crease for gentle definition.
If you want to add even more emphasis to the eyes, you could a dark brown kohl pencil and line the inner waterline and draw a mini wing, smudging it out… to make your date, your boyfriend stop and stare.
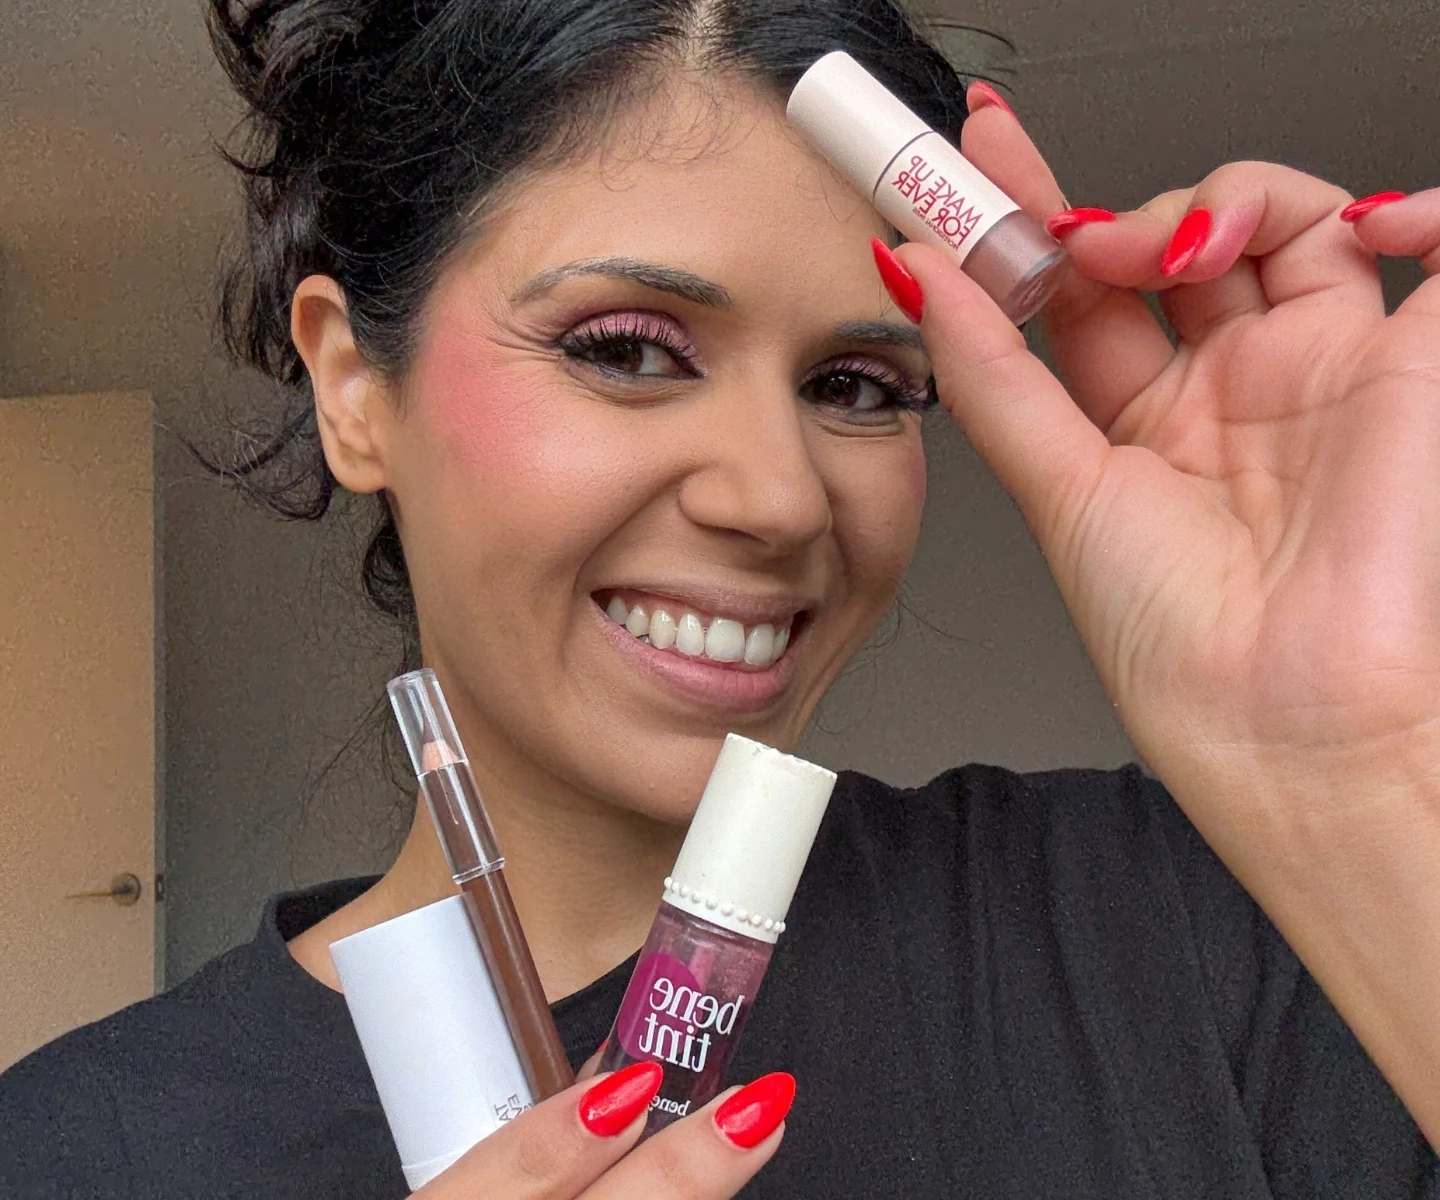
Now for my favourite bit: mascara. Honestly what is a romantic makeup look without fluttery lashes that make people ask if they're falsies? And for that effect you NEED the L’Oréal Paris Lash Paradise Forever Noir Volumising Mascara. It focuses on length, separation and did I mention va va VOLUME?
Step 6: The Perfect Valentine’s Day Lip
This make or break in my opinion. A common question every year is what the best lipstick colour for Valentine’s Day is, and for me, the answer is the more the better.
After all, we want to make a statement.
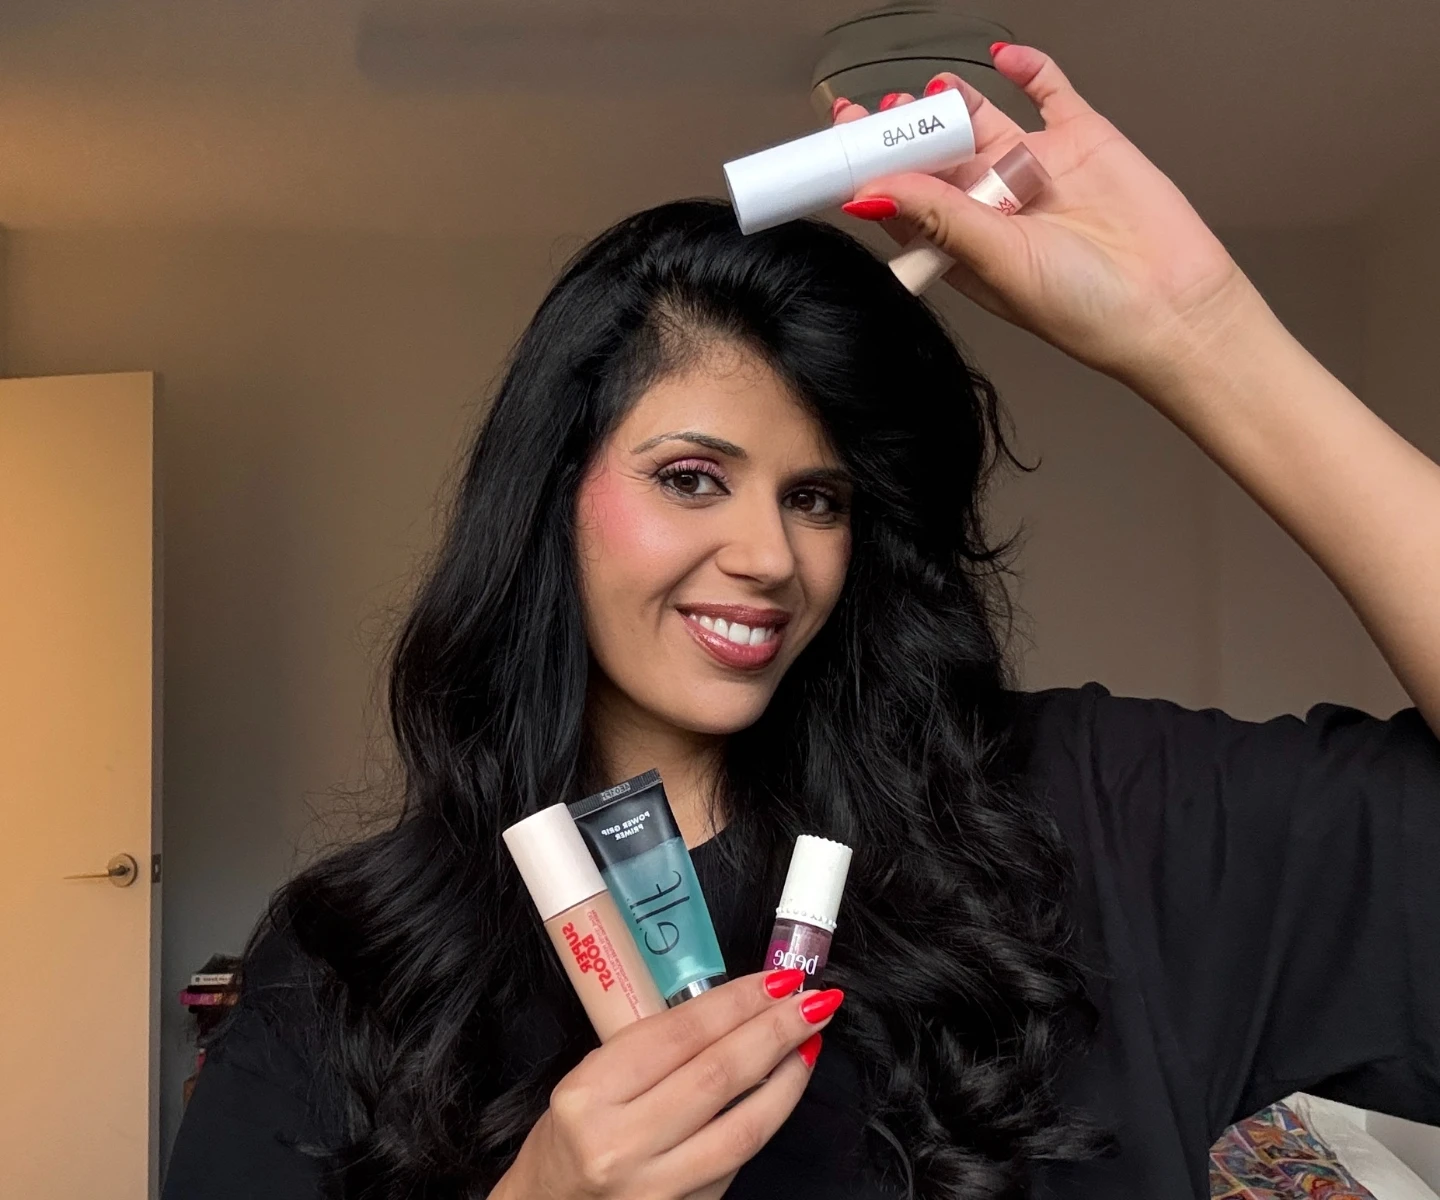
Which brings me to my go to lip combo at the moment.. I line my lips with e.l.f. Cream Glide Lip Liner in Dark Cocoa to add subtle definition, then I apply Benetint Lip Stain for a natural flush, and finish by dabbing the AB LAB HA Plump Lip and Cheek Multistick in the centre of my lips for a hydrated, plump finish and go in with MAKE UP FOR EVER Superboost Moisturising & Plumping Lip Gloss.
The result? A soft chocolate-y red lip that looks kissable but.. not overdone.
It’s comfortable, juicy, long lasting (thank you benetint!) and perfect for a long night of talking, laughing or even a little smooching.
Step 7: Set and Voila!
And then of course, we need need to set the makeup with L’Oréal Infallible Setting Spray which keeps everything in place for up to 36 hours!!!
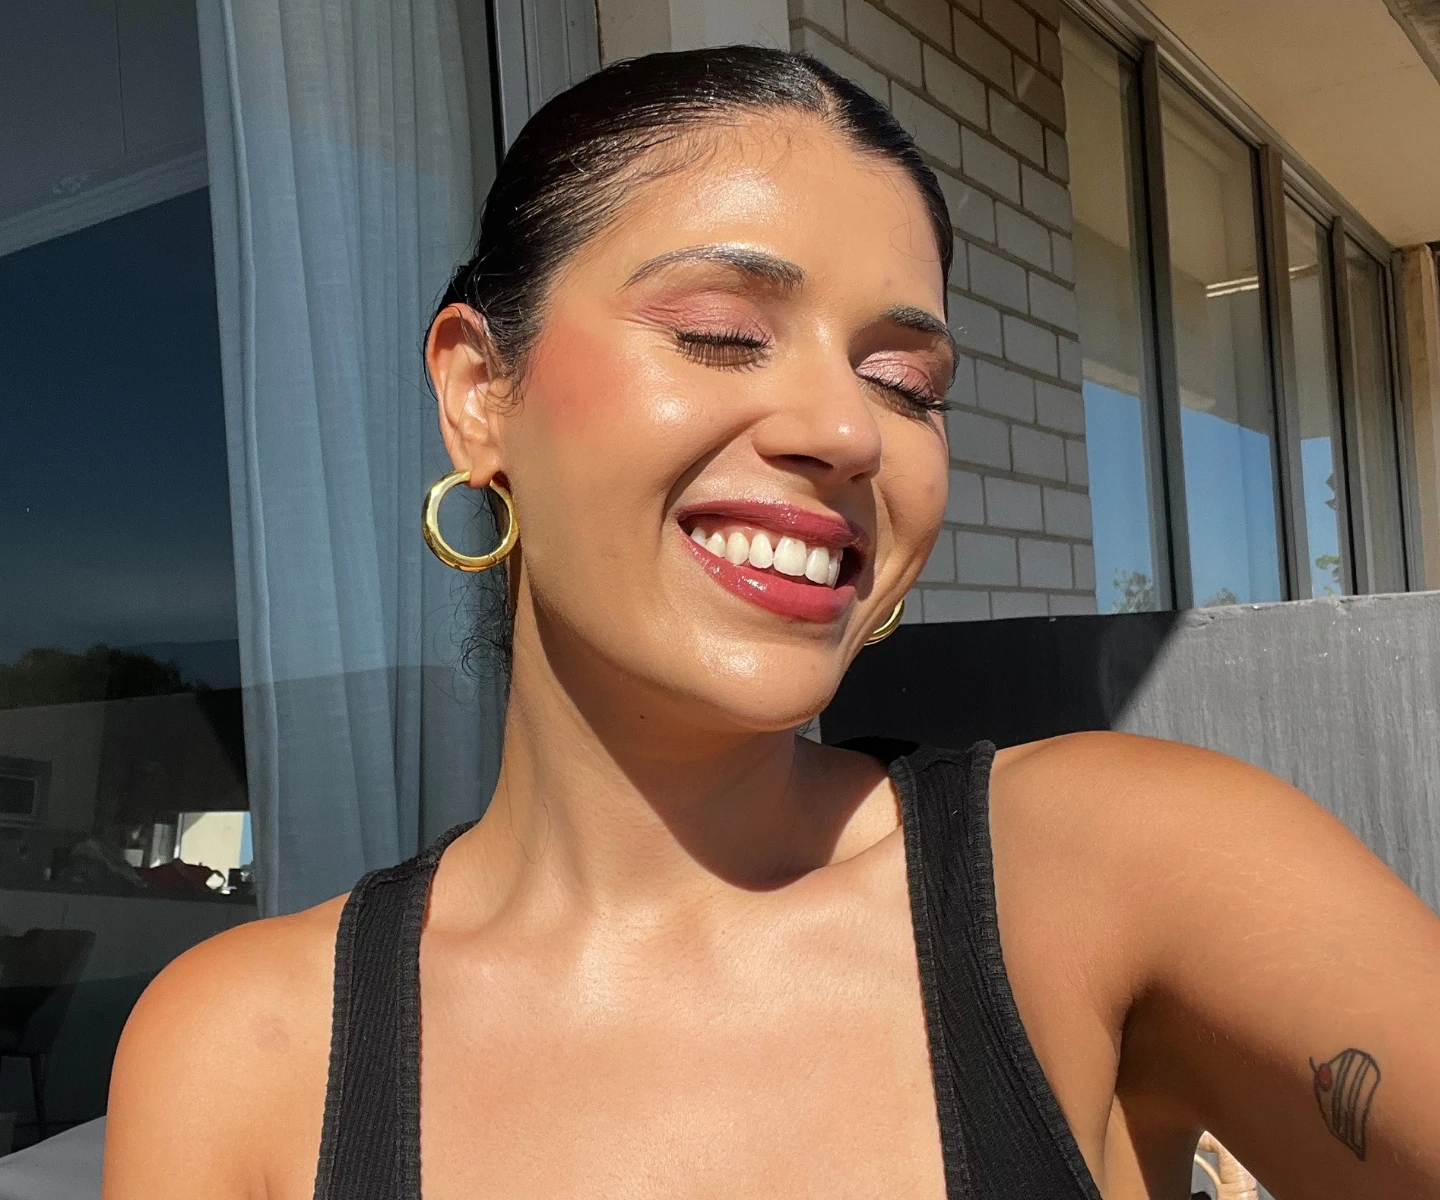
Honestly, I just love this look because it reminds me that I can feel soft without feeling small, be confident
without being loud and wear makeup without caking it on.
So.. whether it’s Valentine’s Day, Galentine’s Day, or just a normal day you want to romanticise a little, I hope you recreate this and wear this look…for you. x
Want more trending beauty content? Try these Beauty IQ articles next:


