A Glittery Eyeshadow Look My Teen Self Would Be Obsessed With

Flick is Adore Beauty’s Creative Copywriter. She started her writing career covering women’s sports and interviewing musicians and can often be found photographing gigs on the side. She’s no stranger to a rotating skincare cabinet and is currently on the lookout for a skincare routine that caters to redness, sensitivity and texture. She also used to complain when her mum would tell her to wear sunscreen and for that, she'd like to publicly apologise
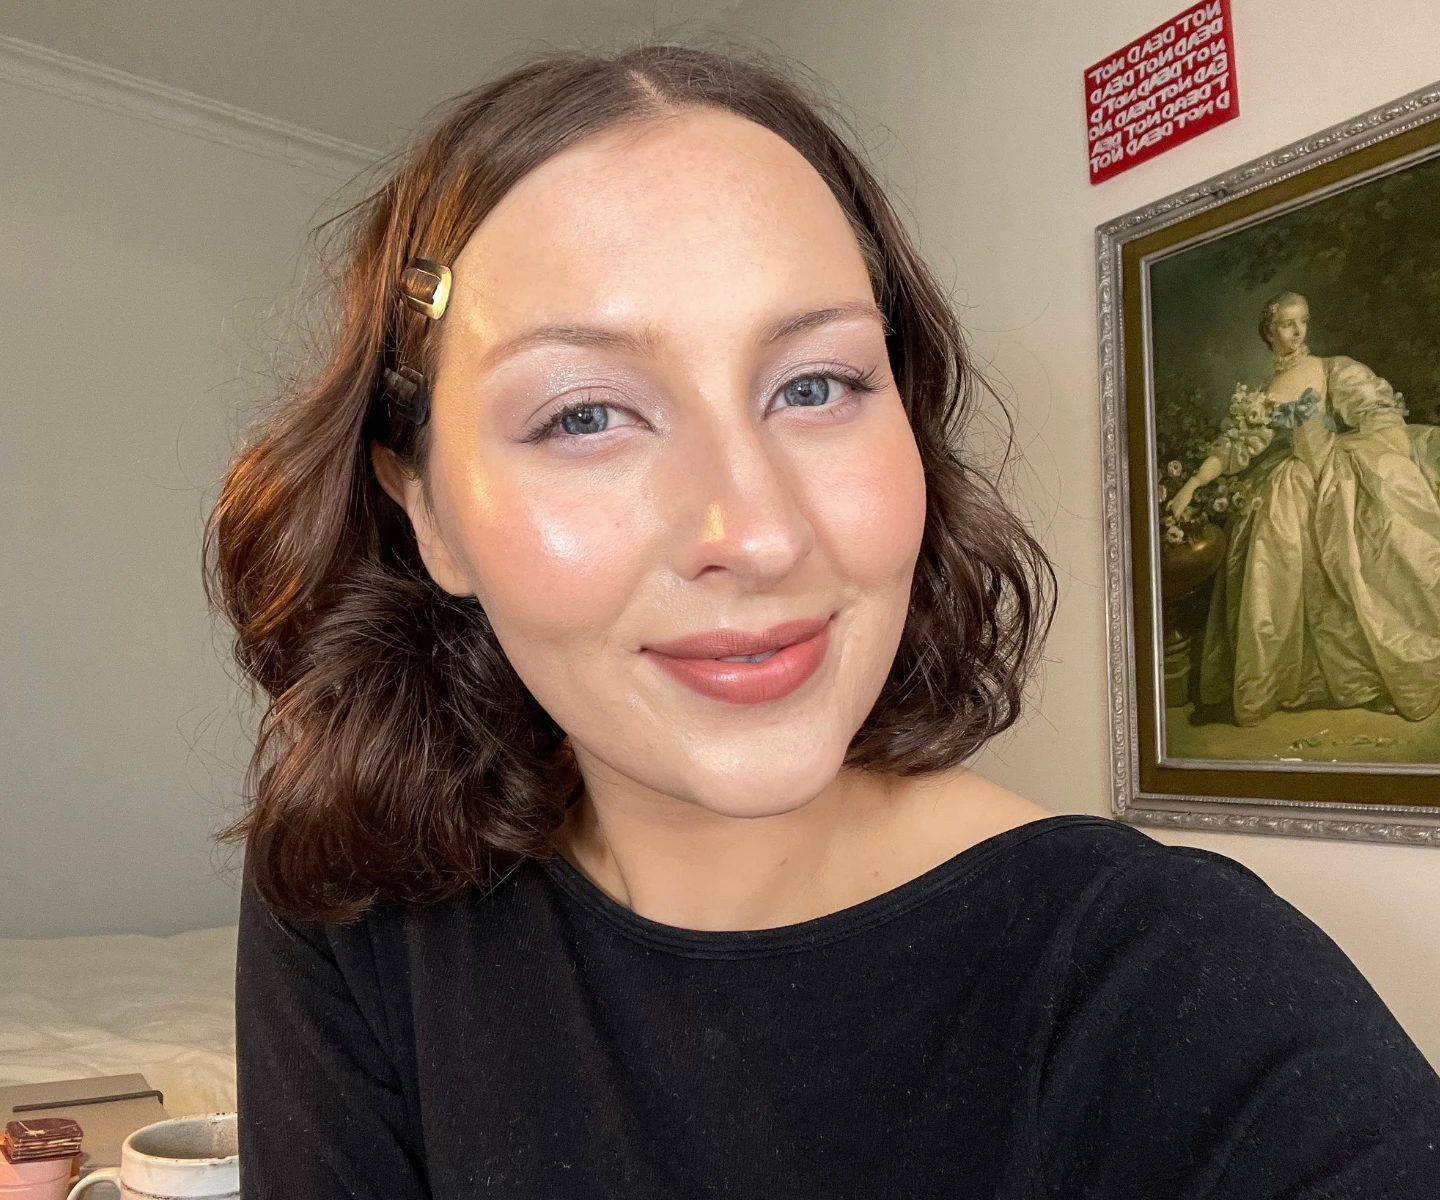
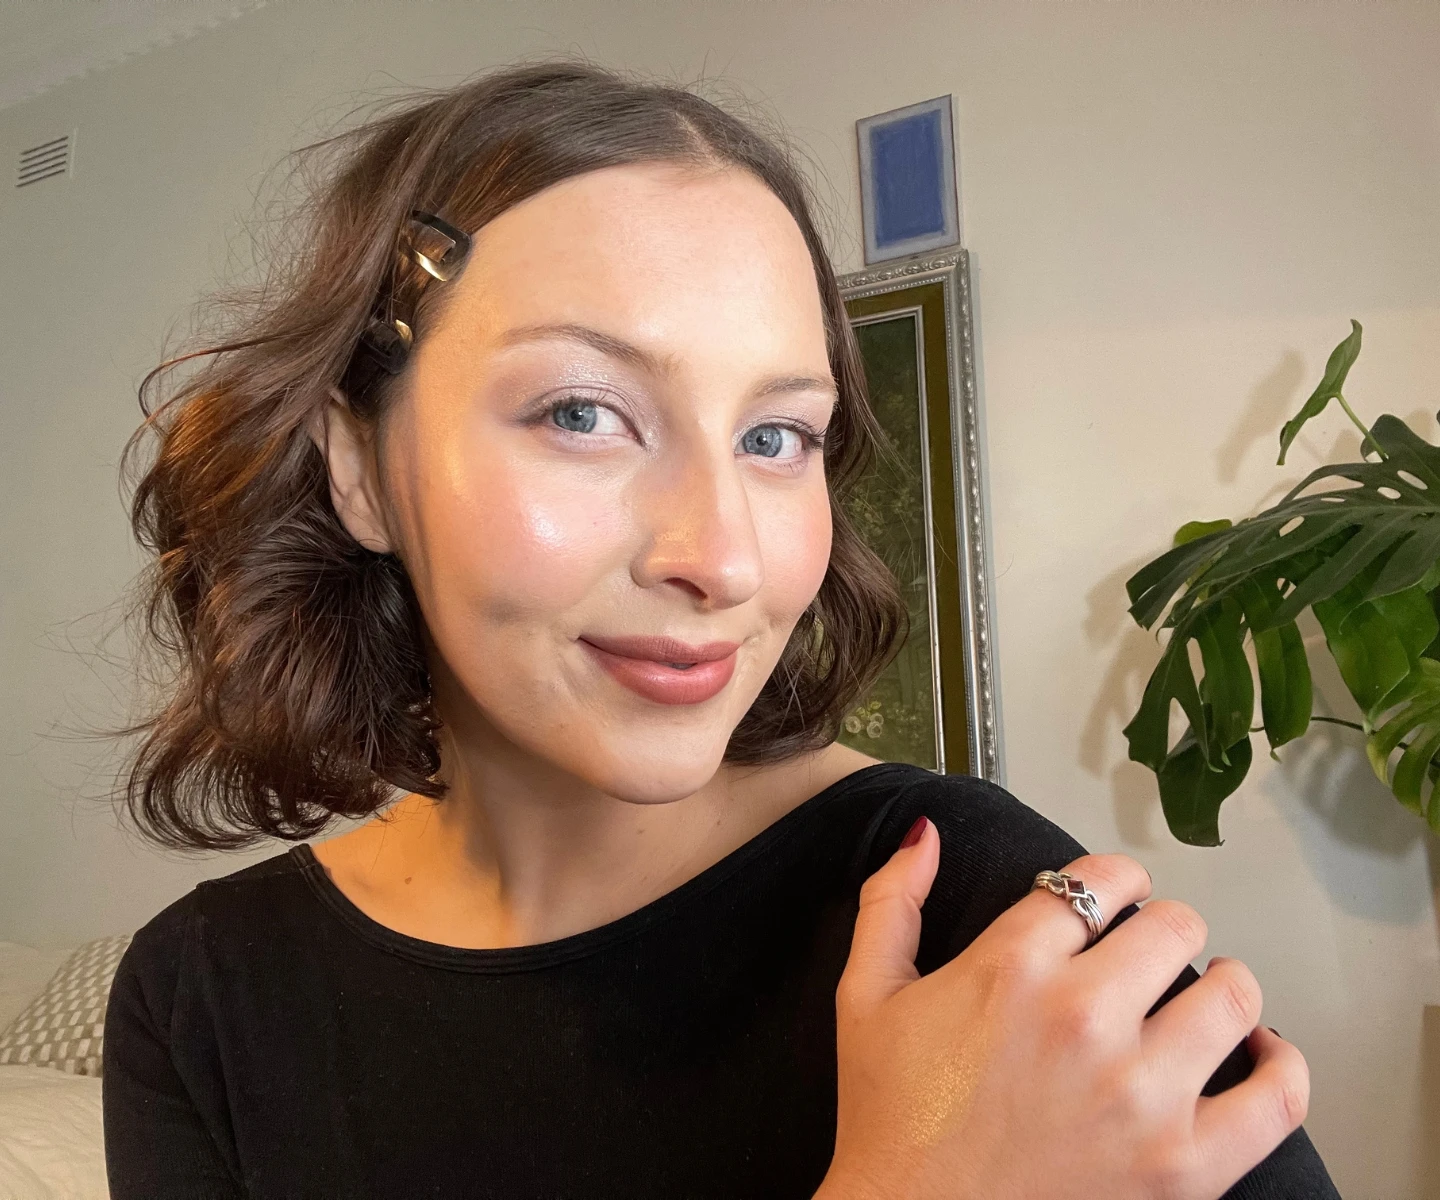
No more no-makeup-makeup! I’m doing disco now.
When I was a child (ugh, groan but stay with me) I just assumed I’d have all these occasions where I would get to do out-of-this-world glam.
Like, here’s a business lunch that needs the power suit and red lip combo, or a red carpet premiere (SATC left me delusional) where you have no choice but to don the sequin gown and bold eye.
But guess what? Zilch.
To this day, I’ve never been spontaneously invited to a masquerade ball and it kills me.
I am willing to shoulder some of the blame though, every time an event pops up on the social calendar, my makeup tends to lean towards just… nice.
In the same vein If I were to make myself into a Sim — it’s a familiar face, but with clearer skin, longer lashes, and a touch more contoured.
So, after this bout of reflection, I’ve decided to indulge my inner child and let her (occasionally) take the makeup wheel. I’m fiending for the hit of dopamine that comes from playing with glitter so I’m taking a little disco-inspo.
I apply makeup without rhyme or reason — it’s basically just a series of endless small tweaks until I’m happy, or I run out of time and have to drag myself out the door.
Follow along below for a visual guide on how to create my disco eye look.
Everything I Used for My Disco Eye Look:
This palette is exquisite. The shadows are a texture I’ve never seen before, they’re like a creamy, buttery clay that somehow goes on like a powder. They apply well with a finger or a brush.
These are soft and a bit smudgy but you can still get a solid line. They’re easy to play with and far more forgiving than a liquid liner. I used the shade 'Smokin Topaz' around my eye, and 'Quartz Queen' on my water line.
Shameless plug. They’re great, and the domed bronzer brush will forever have a place in my makeup bag/heart.
A creamier, peach version of its iconic cousin Benetint.
I start every eye look by sweeping bronzer all over my lids — it calms my eyeshadow nerves and helps blend everything with my face makeup.
It didn’t feel right to do disco-inspired makeup without a lash, these thin knot-free individuals blend in nicely and add a little extra impact to the look.
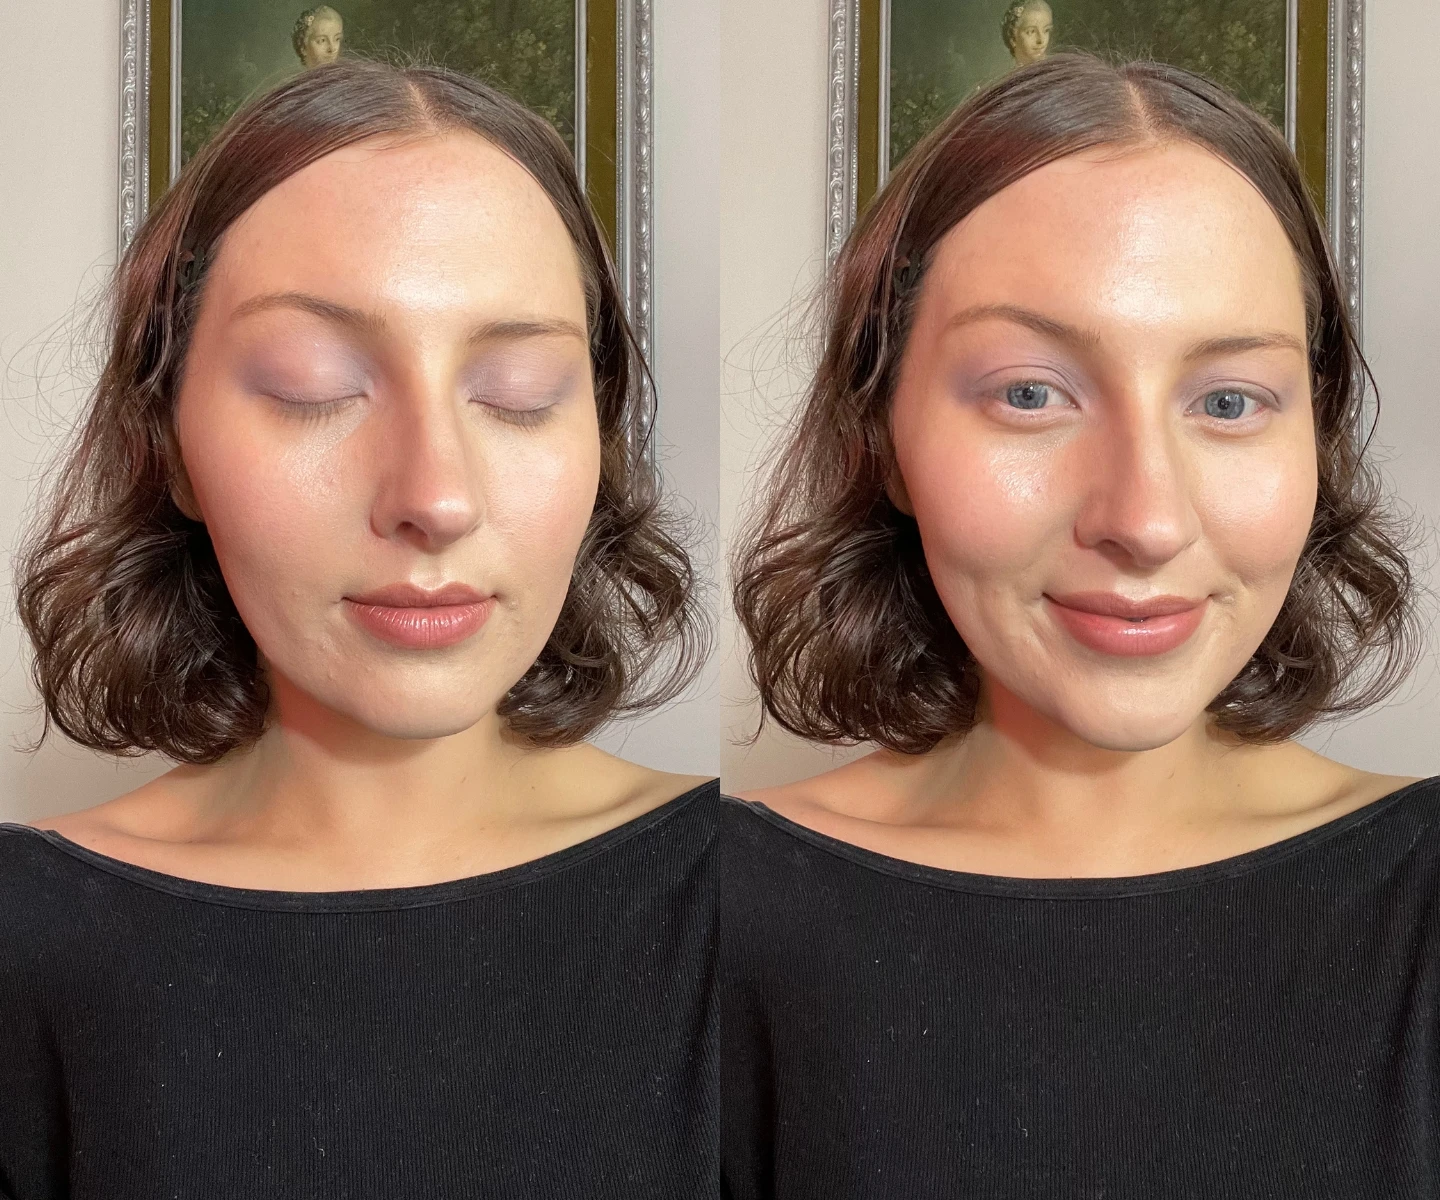
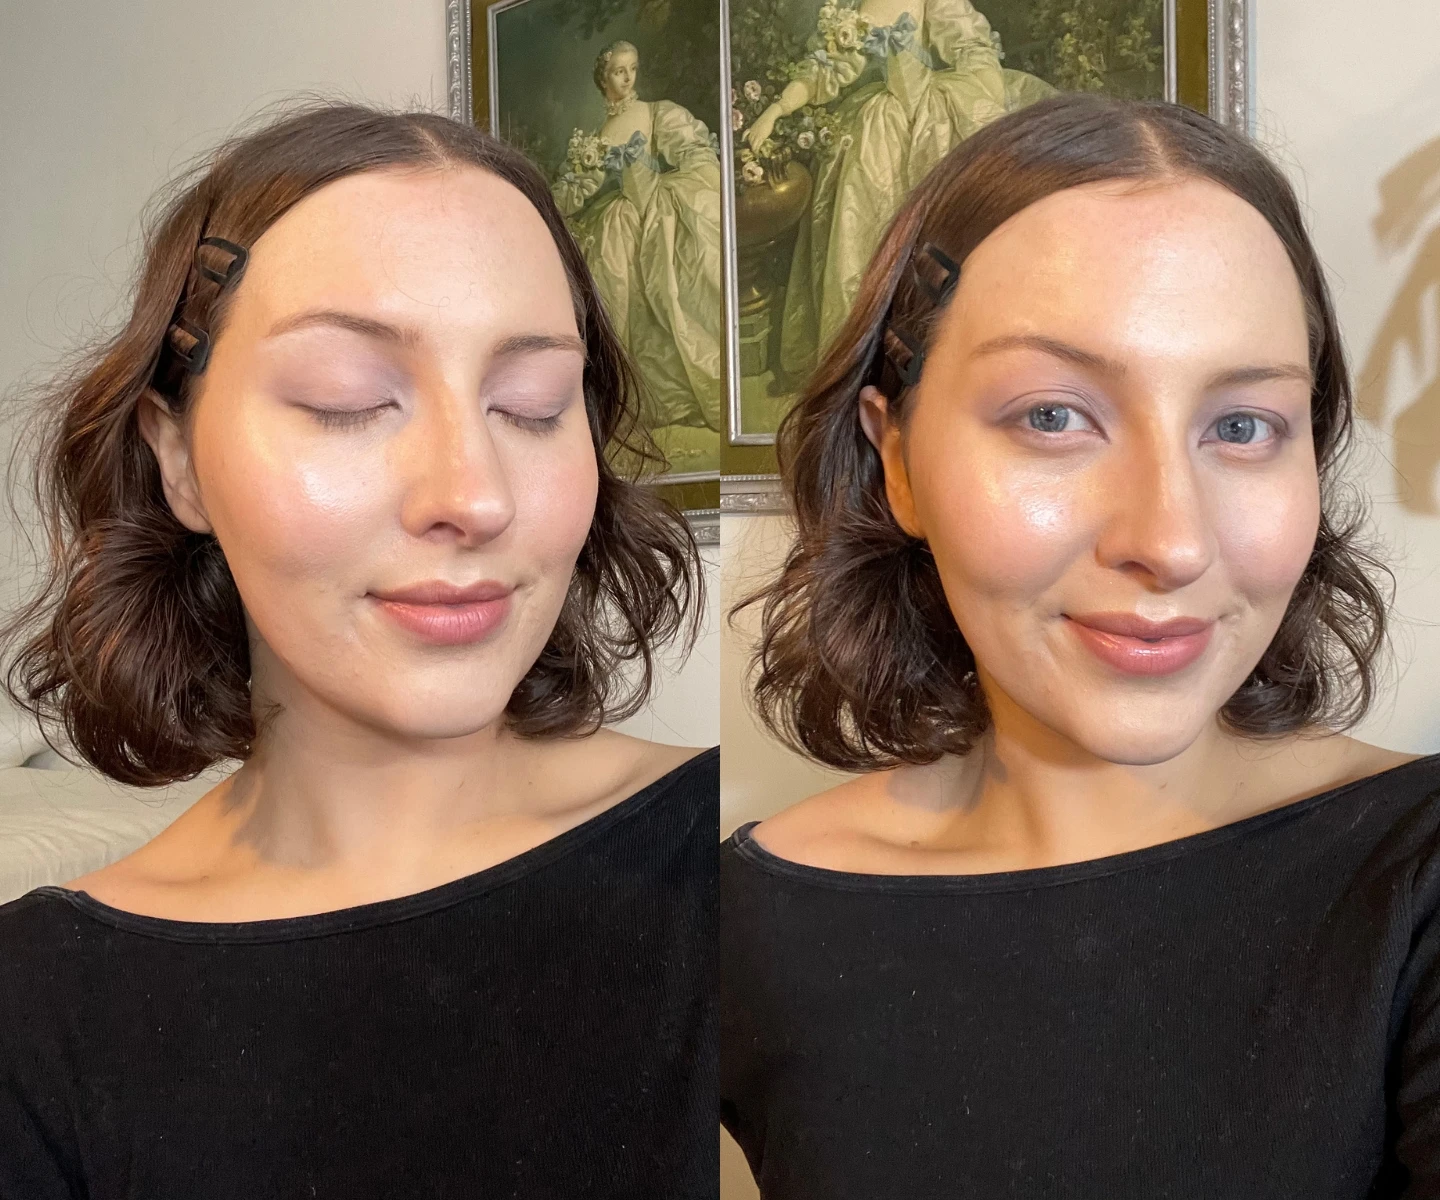
My Disco Eye Look Tutorial.
1. Dust eyelids with bronzer.
I’d already done my base makeup so my eyelids had a little foundation on them and I like to think that’s *basically* eyeshadow primer.
If your makeup creases it just means you had lots of fun moving your face. C’est la vie. Anyway, dust those lids with a few swipes of bronzer to get started.
*I’m sure eyeshadow primer works really well, but I wouldn’t know because I keep forgetting it exists.
2. Line your waterline with a light eyeliner.
Run the liner once or twice over the bottom waterline. The light colour helps brighten them up but I find too much tends to look a bit like costume makeup on me (and today we’re not going for that).
I’ve used the NYX Professional Makeup Vivid Rich Mechanical Liner Pencil in the shade Quartz Queen.
3. Apply shadow all over lids.
Using a fluffy eyeshadow brush take a shadow that’s a bit darker than the bronzer but still pretty soft and apply it all over the lids, going above the crease.
I’ve used the Adore Beauty Tools of the Trade Eye Shader Brush and the Mauve shade in the Huda Beauty Creamy Obsessions Greige palette.

4. Apply a darker shadow on the outer/inner of your eyelid.
Using the light grey in the Creamy Obsessions palette and the same brush as before, apply a wash of shadow on the outer and inner parts of your eyelid.
Kind of like you’re tracing the outside of your eyeball (kind of gross but you get the picture).
5. Line your eyes and add a white shadow to your brow bone and inner corners.
Use a brown pencil to very softly line the top and bottom outer edges of your lash line and the inner corner of your eye.
Basically, I’m not putting liner on the top middle of my eye, or more than halfway along my bottom lash line.
Add a white shadow to your brow bone and the inner corners of your eye to highlight.
I’m using the NYX Professional Makeup Vivid Rich Mechanical Liner Pencil in the shade Smokin’ Topaz, and the lightest shade in the Creamy Obsessions palette.
6. Add the finishing touches (lots of glitter and lashes).
Using your finger, swipe on a sparkly or metallic eyeshadow. I’m using the centre colour in the Creamy Obsessions palette. My only tip here is to just let loose.
Apply glitter all over your lid and if you’ve got hooded eyes like me, a bit above as well.
In my case, I put it everywhere apart from the brow bone highlight. I then glued on individual false lashes and blended them into my real lashes with mascara.
While the glue dries (post-glitter and pre-mascara) is also the best time to tweak — I relined my eyes wherever I wanted more definition/wherever the metallics had taken over.
I also added some more bronzer, blush and lined my lips (M.A.C Cosmetics Lip Pencil in 'Whirl' — I wear it daily and have several thumb-sized knubs of it in my purse).
Time to head out into the world and leave trails of glitter.
In the mood for more makeup? Head here next:


