Kérastase Hair Care Routine for Bleached and Damaged Hair

Ex Hairdresser/Makeup Artist & all around Beauty nut
If you’ve come to a point where colouring and bleaching your hair is causing significant damage, it's time to stop, take a breath, sit down and read this guide.
In this routine Millie Porter from our Customer Service Team, who is also an ex hairdresser, talks us through the Kérastase products that revived her damaged hair when she began to experience breakage after bleaching.
While there is a point of no return when it comes to bleaching and breakage, Millie’s hair care routine has helped restore health and vitality to her platinum blonde locks.
How I Saved my Damaged Hair with Kérastase
Millie’s Best Repair Tips:
- Millie’s key tip for damaged hair is not to touch or brush it too much while it is wet. This is when it is most fragile and prone to breakage.
- Double cleansing is very important for creating lengths that feel silky smooth. Your first cleanse will remove dirt and oil and the second cleanse works to actually clean the hair.
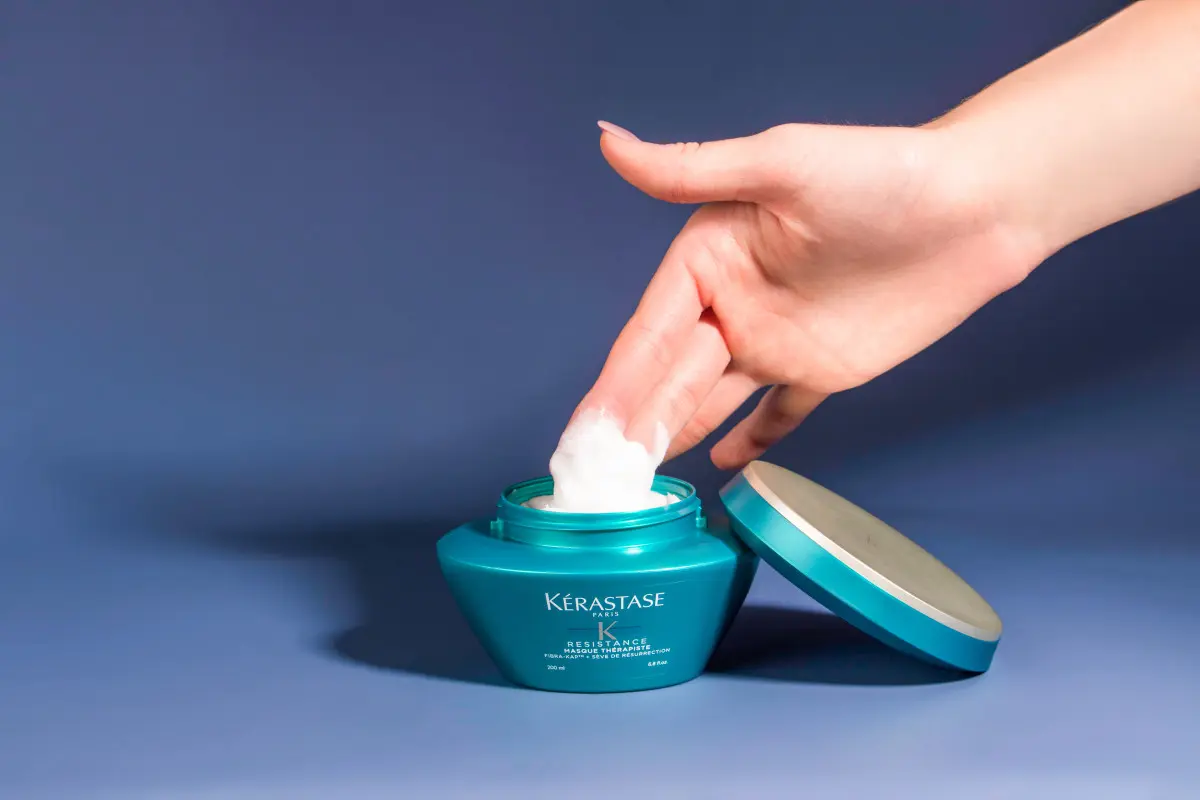
- You can use the cap of your Kérastase mask to scoop out the product.
- Work your mask into the roots of your hair using light pulling motions with your fingers.
- Promote blood circulation by massaging the scalp.
- For the best results try using the Kérastase Thérapiste range for 4-6 weeks.
How do I fix my damaged hair?
Fixing damage is something we can all do with the right products, but breakage is a different story.
As Millie explains, once the bonds in our hair are overexposed and separate completely (causing breakage), little can be done to fix them.
This is why it’s important to repair damage before it gets to that completely broken stage.
Millie’s Kérastase Thérapiste Routine:
Step 1: Start with a pre-shampoo

Step 1: Start with a pre-shampoo
Millie starts her routine with a pre-shampoo like the . Place a small amount of product in your palm and apply to the mid-lengths and ends of your dampened hair. This pre-shampoo works like a reverse care conditioner and actually nourishes the hair and protects it before applying regular shampoo.

Step 2: A nourishing cleanse

Step 2: A nourishing cleanse
Next, take a dollop of the and rub it between your palms before you massage this product softly into the roots. Be super gentle when applying this! This unique formula has a gel like consistency and helps to repair the hair while cleansing.

Step 3: Pre-cleanse again or add a mask

Step 3: Pre-cleanse again or add a mask
The doubles as a conditioner, so you can use this again or add a mask. Millie uses the , which is also great for thick or curly hair. Take out a small scoop using the cap of the product, about the size of a 10 cent piece, and leave in the mid-lengths and ends of your hair for 5-20 minutes and rinse.

Step 4: Smooth down split ends

Step 4: Smooth down split ends
Millie uses the to smooth down split ends and provide some heat protection. You can put it into the hair wet or dry, applying 1-3 pumps depending on your hair type. Mix the cream and oil on your palm and apply it to your lengths and ends.

Step 5: Scalp care

Step 5: Scalp care
Provide your scalp with some care using the . This holy grail serum promotes hair growth and thickness. Apply 2-4 drops straight from the pipette and massage into the scalp, and then lightly comb through.

Ready to start your Kérastase journey? Try our Kérastase hair quiz to find the perfect product for you, in under 30 seconds.
This routine was transcribed by India Williams

How I Recovered From An Accidental Mohawk Mishap
About 10 months ago, I sat happily at my usual hairdresser, unaware of what was about to happen to my perfect blonde lob as I...

What The Process Of Going Blonde Is Really Like For Someone With Black Hair
This is exactly how we tackled my mop to take me from super dark, to a light blended caramel...


